About

About Sicaria
Sicaria is a third-person stealth game set in Antwerp during the Eighty Years' War.
You play as an engineer, a person capable of overcoming any challenge through your own cleverness. Because of the war, you lost an arm, but you were able to build a mechanical one. Go forth and get your revenge on those who wronged you!
Stealth Centric Gameplay
Emphasize stealth and infiltration as the primary gameplay interaction.
Use the environment and your skills to remain hidden and accomplish missions undetected to avoid death.
Historical Setting
You are immersed in a realistic reconstruction of the city of Antwerp during the Eighty Years’ War. You feel inside a dangerous urban warfare.
Use the city structure to your advantage, explore multiple pathways and take advantage of the verticality.


Engine
Unreal Engine

Team Size
32 People

Genre
Third Person Stealth

Development Time
32 weeks
Project Responsibilities
Technical Design
-
Designed and championed a body-carrying system using a mix of custom animations and in-engine physics manipulation.
-
Prototyped an enemy takedown system.
-
Used and wrote documentation on the beta unreal engine plugin "Physics Control"
-
Various smaller technical tasks.
Animation
-
Created several custom animations for our project as our team's animator in Cascadeur
-
Organized and directed a motion capture shoot using Xsens suits.
-
Cleaned up motion capture footage in Cascadeur.
-
Integrated various animations into both our main player character and NPC enemies.
Animation Work
Throughout the duration of this project, our team was without any full-time animators. I took up responsibility for both providing animations for our team and researching alternative methods by which we could reduce our animation workload.
Below are some examples of the animations I made for our project and a showcase of them used in-game. These were all made in Cascadeur.
Takedown Prototyping
Prototyping takedowns
Before we had yet to decide on a story or narrative for Sicaria, we were certain that within our game we would like the ability to take down enemies
I first worked on creating a system that identified when an enemy is facing away or towards the player, detecting whether or not the player is within range to take down and then the teleportation/motion warping logic to move to the right position in order for the takedown animation to play, which I also animated myself.
Below you can see the various iterations of my design on this feature. This feature, after the first block, was taken into production and improved by a programmer in our team.
You can see the final result in the released project.

Final Takedown Prototype
Motion Capture
A Sense of Neccesity
Due to the lack of animators and the scale of the project, motion capture was one of the first alternative methods I looked into for reducing the animation workload for our project.
I looked into several facets of motion capture throughout the runtime of this project, including:
-
Cascadeur video mocap functionality
-
Xsens body suit motion capture
-
Motion capture cleanup pipeline

Play The Game!
Video Mocap Experimentation
Early on in the prototyping stage of the project, the looming issue of animation workload was already quite clear to us as a team.
To this point, I worked together with some of my fellow teammates to explore the possibility of using video motion capture functionality.
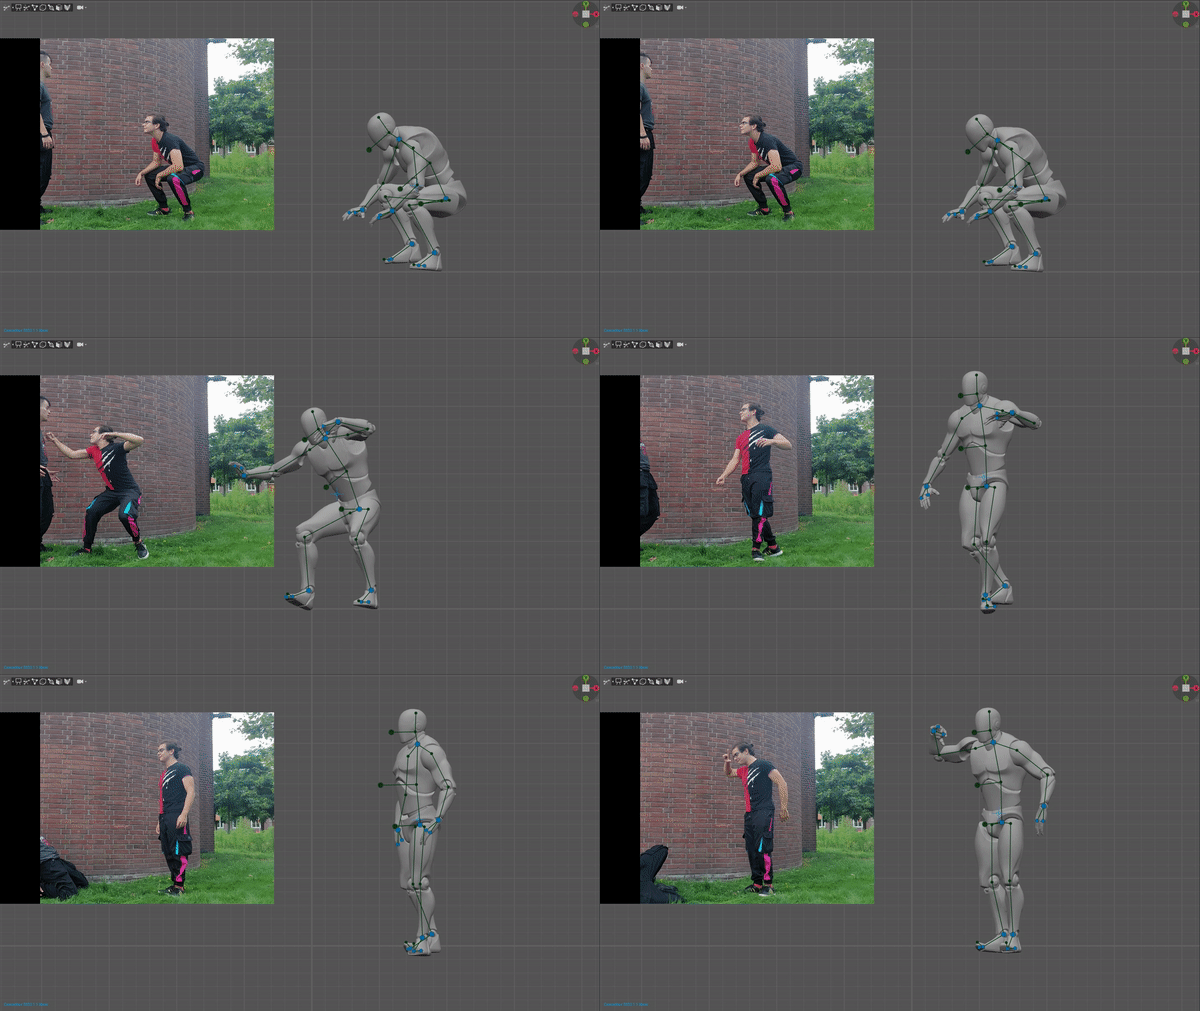
This beta functionality built into Cascadeur would allow us to take video footage and create motion capture data from it.
The results were a bit of a mixed bag but they provided valuable insight into the mocap process within Cascadeur.
On the right you can see an example of the video mocap in action with a video I shot of my teammate.

Xsens Motion Capture Shoot
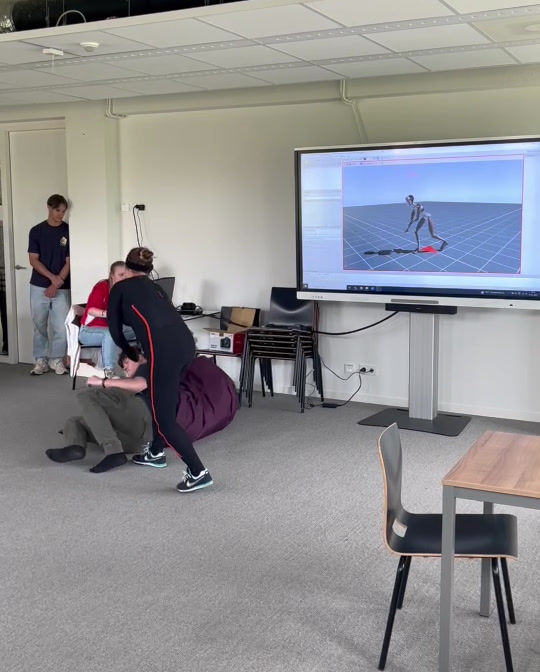
In the latter half of the project, I was presented with the opportunity to do a mocap shoot by an animation teacher I had been in contact with for the duration of the block.
This was a golden opportunity for us to reap a significant amount of animation data, both for gameplay and cinematic purposes.
Together with some of my teammates I organized and planned for the mocap shoot and on the day of, I was given the honor of directing the mocap shoot from start to finish.
To the right are several videos of the mocap shoot in which I can be seen directing and even participating. This was one of the greatest learning experiences of the year for me and set me on a path toward diving further into animation and specifically motion capture.
This shoot lasted a full day and by the end, we had over 80 shots worth of data to sift through. For this, I worked on establishing a motion capture cleanup pipeline within our team.

Motion Capture Cleanup
Given the rather large amount of mocap data we had received from the abovementioned shoot, we needed to create a systemic way of processing all this data. To the right you can see the pipeline I created for me and my teammates to follow for the cleanup process.
The Motionbuilder work was done by our team's Rigger who had experience in Motionbuilder, cinematics was handled by another teammate entirely, and I worked on all gameplay-specific mocap animations in both Cascadeur and Unreal Engine.
The cleanup process was a bit of a chore as our mocap actor turned out to be a little shorter compared to our player character, leading to a lot of slumped shoulders and weird spinal issues.
Using Cascadeur's animation unbaking functionality I was able to effectively edit and tweak the animations to a showcase-worthy state, an example of which is shown right below this text.

Raw Mocap
Initial Cleanup
Final Pass
Body Carrying
Cutting Edge Tech
To say the Physics Control plugin was a new feature when I started working with it would be an understatement.
After careful research, I only found 3 online pages containing information about setting up this feature, one of which was written entirely in Japanese.
Nevertheless, I saw this as a challenge for my personal development and so I started researching how to utilize and structure work around the physics control.

What is Physics Control
The Physics Control component is a plugin that enables you to add simple, intuitive, and powerful physically-based controls to a Blueprint in Unreal Engine 5.
This plugin was released in Unreal Engine 5.2 and can be seen as a sort of successor to Physical animation, making it easier for developers to tweak physical animation settings through blueprints.
Physics control technically works on a bone-per-bone basis, however, it allows you to create sets of bones in order to make this process easier.
Essentially you could tweak the physics on just the pelvis bone through blueprints, or you could tweak the "Set" called LowerBody which could include i.e. all bones below the pelvis.
This structuring makes the physics control highly customizable. Furthermore, it not only allows you to simulate physics on limbs, it also allows for fine-tuned mixing between both animations and Physics.
Why use Physics Control
My thought process behind why I opted to use Physics Control for our project stems from 2 use cases I could see for our project needs:
-
I was the only animator on our team, and while I can definitely make good animations relatively quickly now , when I was starting out on this project I had close to no animation experience. I was worried about reaching a level of quality good enough to be considered final. By leveraging Physics Control I could use very minimal physics applied to the entire body to increase the "realistic" feeling of the animations.
-
For the body-carrying feature I was assigned, I initially also did not believe I had the necessary skills needed to create a good-quality pick-up animation.
As a technical designer, I wondered if I could use physics control to quite literally "carry" the body in a physical manner. This ended up being the exact method I used for our final product.
A creative challenge
For the duration of this project, I championed the creation of a body-carrying feature where the player could pick up dead bodies in order to move them out of sight from enemies.
I was inspired by games such as Metal Gear Solid V and Hitman and how they handled bodies in the creation of my systems.
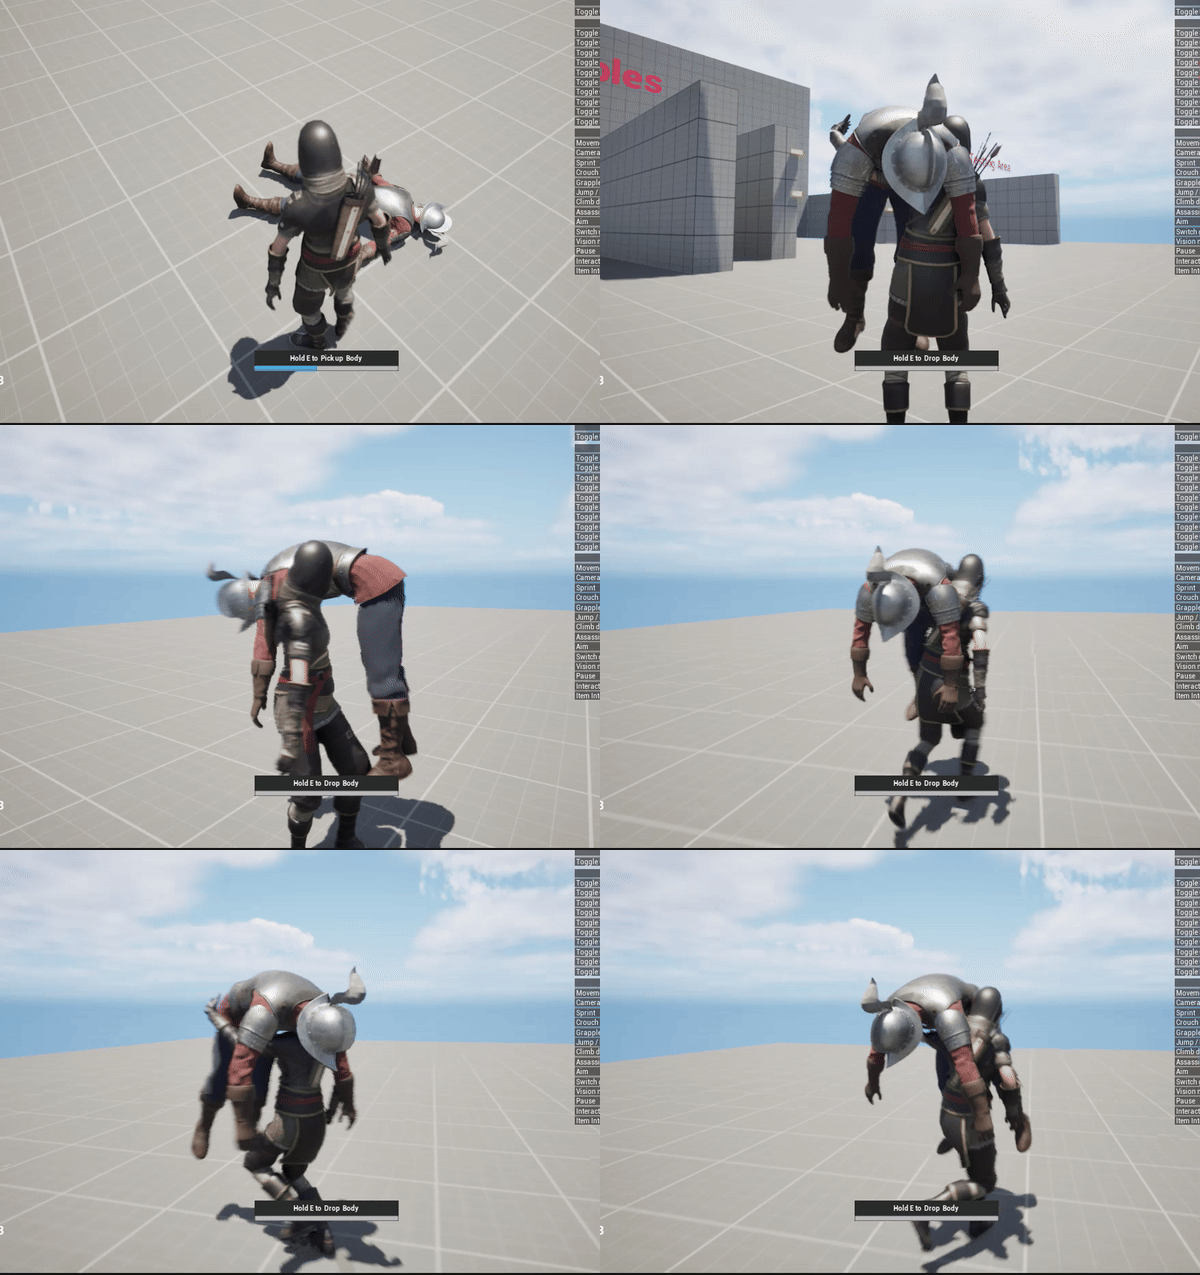
For the body carrying I use a blend of both animation and localized actor-based physics, utilizing the physics control plugin in Unreal Engine for which I also wrote documentation.
Unfortunately, my body carrying was scrapped before full release due to redundancy caused by dead bodies disappearing upon death.
Regardless, this was one of the most educating and interesting systems I've worked on in my time as a developer and I'm very proud of the work I've done on it.

Many Iterations
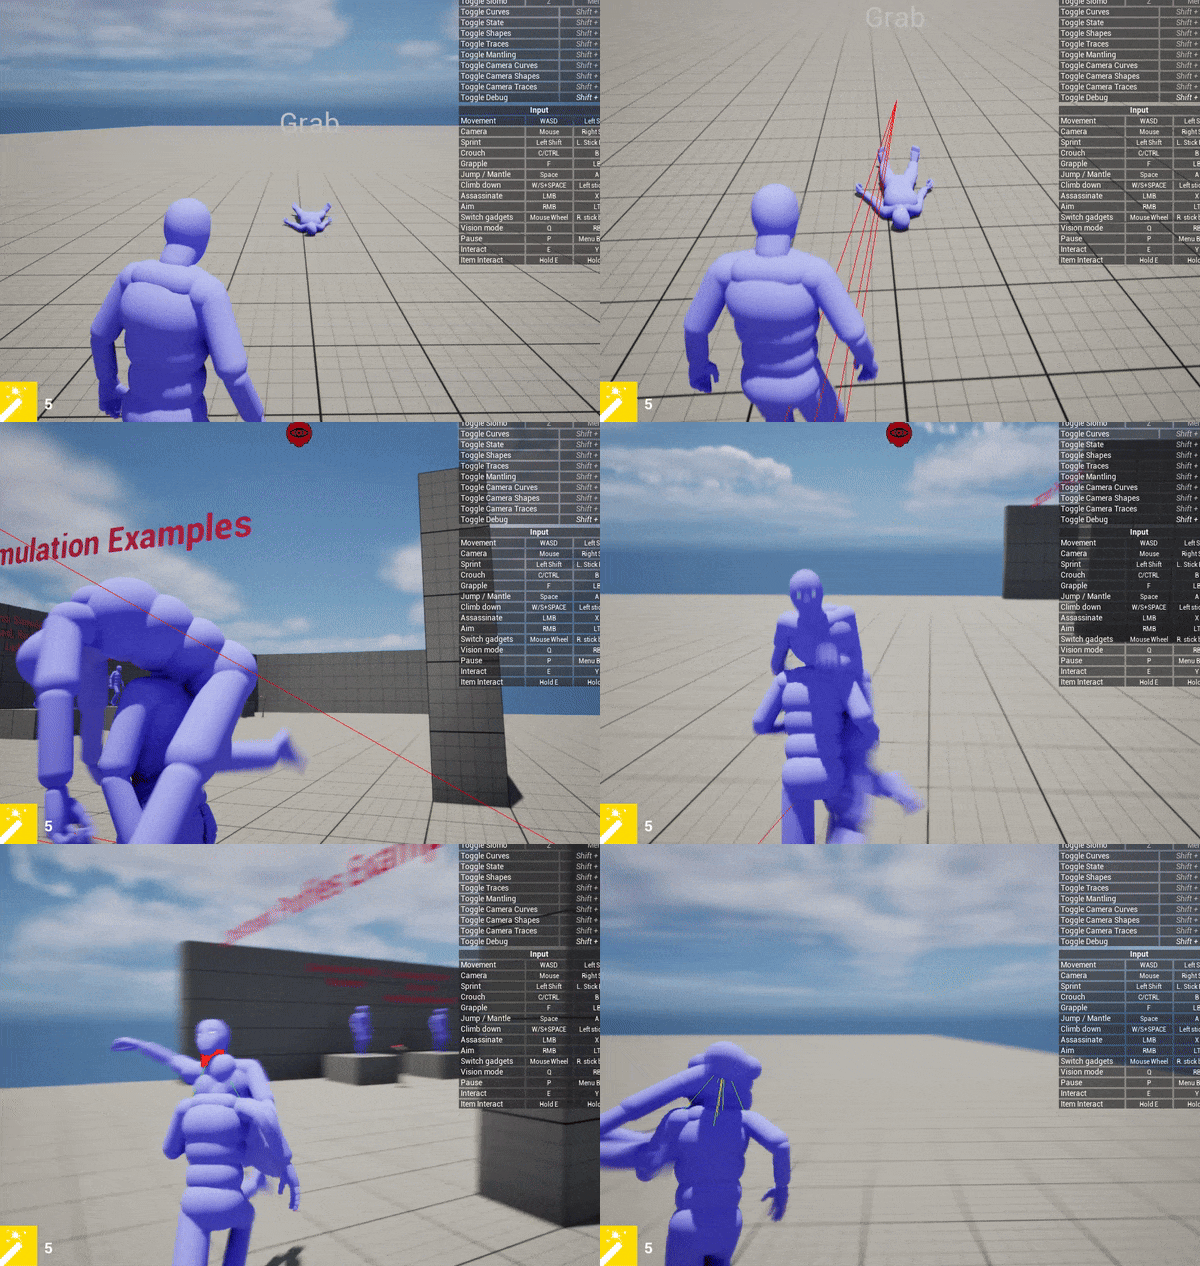
I worked on this specific feature for 3 out of the 4 school blocks of the year, iterating and improving on it every step of the way. I've come a long way from the prototype I made and in the process I learned a lot about animation, skeletal meshes, and Unreal Engine physics.
Below you can see the progression of this feature from initial experimentation to the final release-ready version.
Physics Control Learnings
For the first number of weeks working with this plugin, I just experimented, as there was very little documentation on the feature and I had to really learn by doing.
Below are some of the takeaways I got from my experiments with the Physics Control Plugin


